Hi!
I'm no longer using blogger, so you will be redirected to my new website in 5 seconds. O
r just click: http://nachodevblog.com/
Nacho Dev Blog
This is my personal blog where I ramble about graphics and other stuff.
October 20, 2019
January 6, 2019
3D printing and rockets!
Last December I acquired an Ender 3D, my first 3D printer ever. I assembled it without much trouble and I've been using it since then.
Good points:

- Price (£199), for this value it was hard to resist. Other 3D printers with similar specs are around the 300-600 range...
- There seems to be a great community around it, and it is easy to find 'mods' to improve the machine.
- Assembly was easy and only took a morning.
Now the bad points:
- Some of the pre-installed screws required some tightening as they were loose.
- The power supply wobbles a lot when you (un)plug the power cord.
- I noticed that the heated bed has warped a little bit making leveling it a bit harder.
Overall I would recommend this for any beginner or for someone that wants to get into this hobby without expending a lot of money.
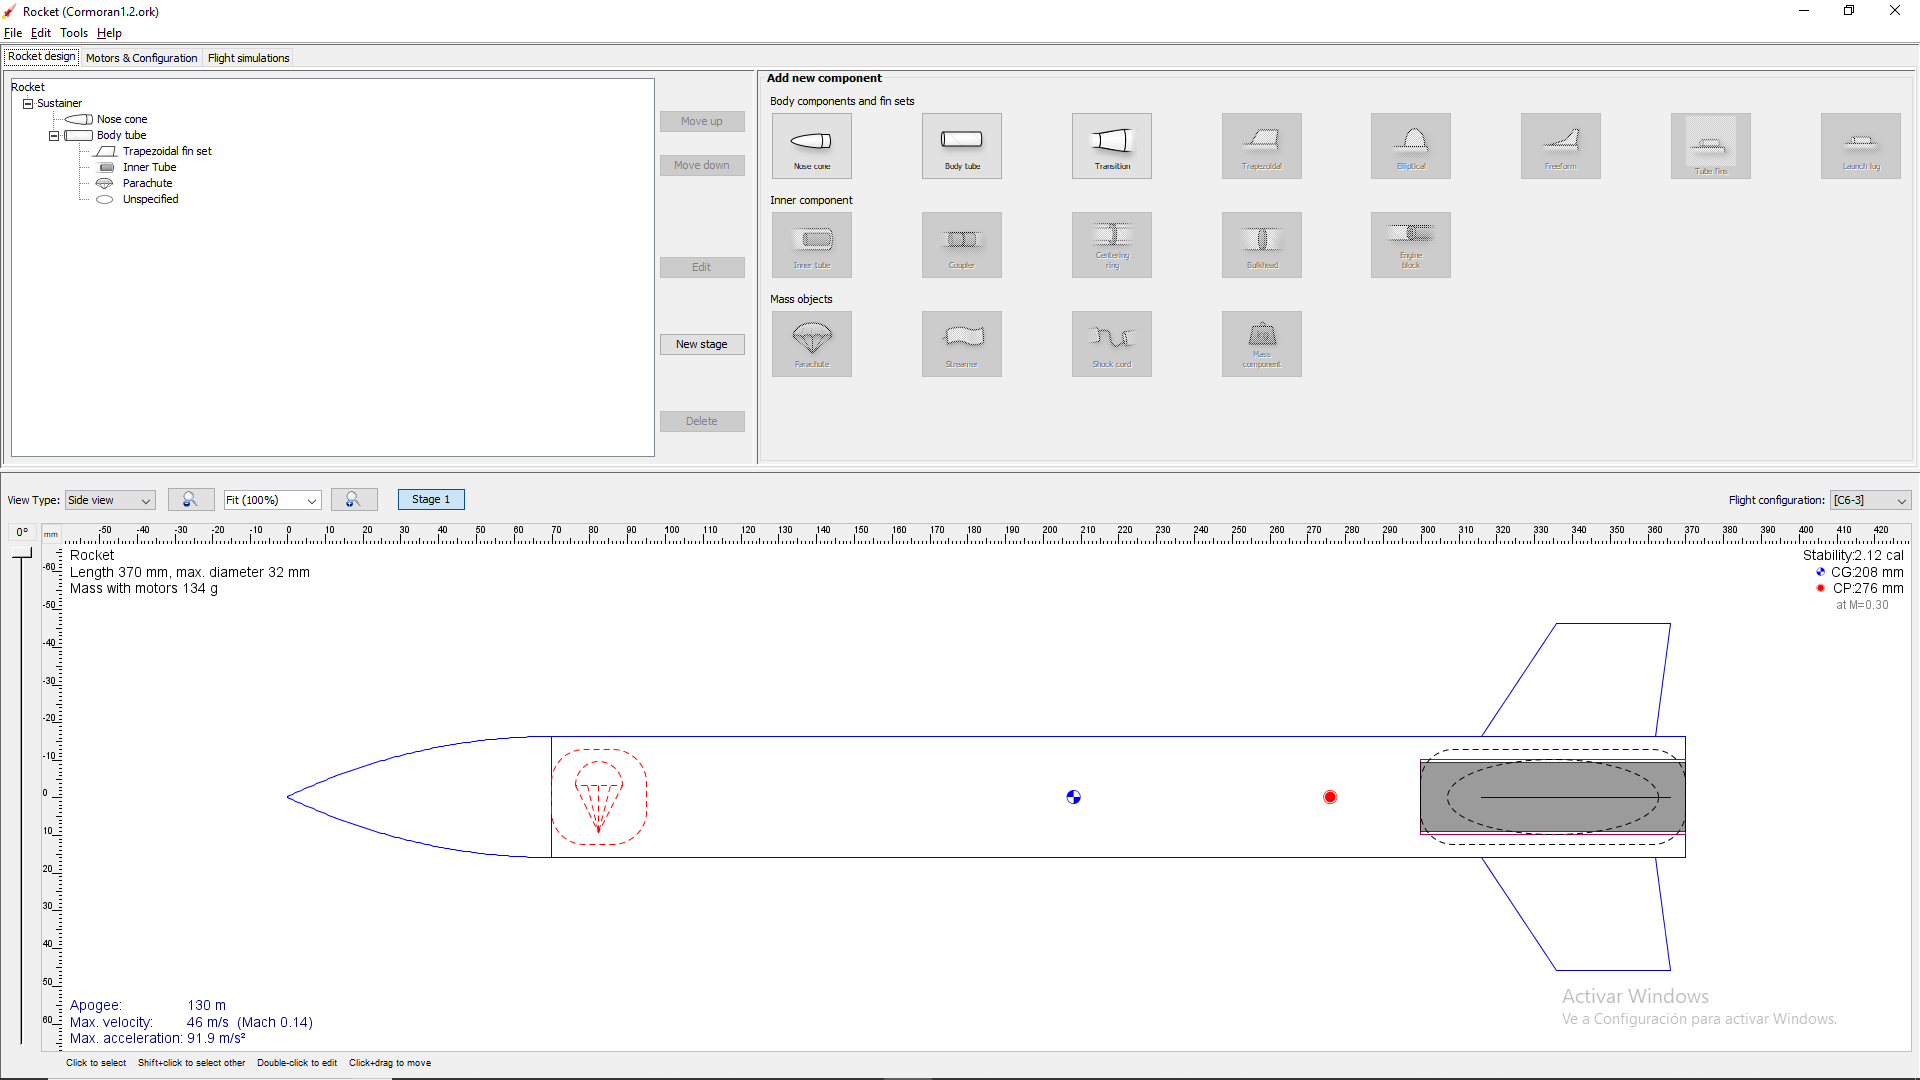
I've been always interested in rocket science, and what best use for my printer that make my own rocket! As a starting point, I wanted to make something simple. So I came up with this design:
 |
| Made with OpenRocket |
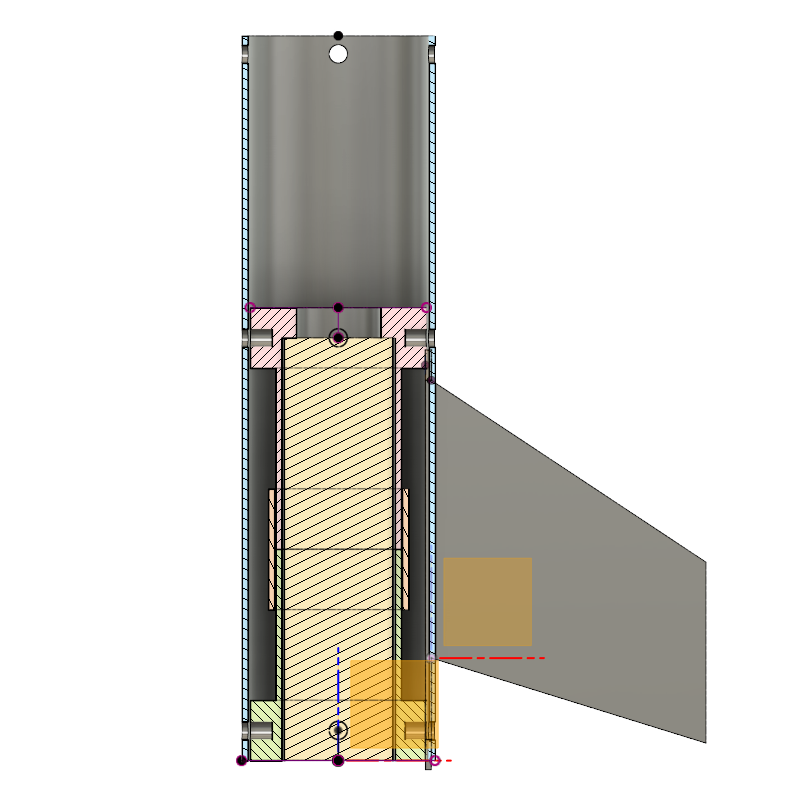
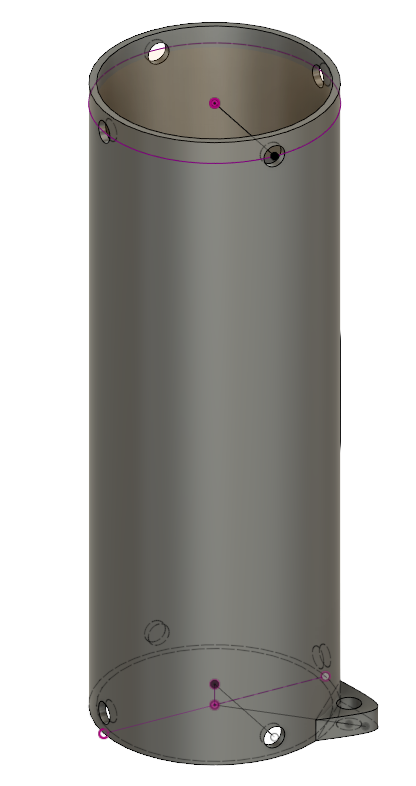
I designed the parts using Fusion360:
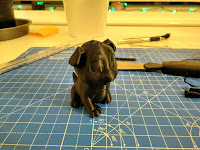
I'm almost done printing all of it. The remaining parts are a bracket to hold the parachute chord and the nose of the rocket.
July 4, 2018
Porting from DX11 to DX12!
Disclaimer: in this post, I´m not going to show any new fancy technique or advanced pattern, I will describe the process I followed to port a rendering framework from dx11 to dx12.
Why?
I started working last June in a company that develops a real-time atmospherics system. We basically provide skies, weather effects and volumetric clouds all in real-time! We have a plugin that can be used in both UE4 and Unity, we basically "inject" our effects into the engine. This means that we are doing native rendering, we don´t render using the interface provided by the engine (the RHI in UE4 or the graphics components in Unity), the consequence is that we have full control of what is going on inside our rendering code but it also means we have to implement all the required rendering functionality. Until this point, we only had a dx11 and PS4 renderer, with that, we could reach most of the market: PC, XBox One and PS4 which are the main platforms of the generation. But we can´t just ignore the new APIs (namely Vulkan and DirectX12), at some point, we have to support them! Another major reason is that UE4 will deprecate DX11 support in favour of DX12, at least in XBox.
The process
When I started working on this task, I didn´t know much about DX12 (neither DX11) I´ve been exclusively using OpenGL for the last 4 years. I had played around with both Vulkan and DX12 (following tutorials and rendering the hello world triangle, and that's it). The first few weeks I studied all the resources online about DX12. Initially, I couldn´t find much, but I´ve made a list with a few essential sources:
- Direct 3D 12 Programming Guide (MSDN): this is the official DX12 doc, initially I thought that it was bad, but with the time, I started to appreciate it. Most of the enums are explained there and function parameters have a description too. You can also find a few tutorials about the resource model, pipelines, barriers etc.
- Microsoft DX12 Youtube Playlist: here you can find a 3 part tutorial related to resource binding, I really recommend watching this! Also, there is a video for dx11 developers porting to dx12 (this is useful even if you don´t know dx11).
- Braynzar Soft tutorial: some of you may know this website as it also has a dx11 series. For me, this was a really important source as it describes every basic aspect giving a lot of details and diagrams.
- Intel´s Direct 3D 12 overview: it covers the core aspects of the API: resource binding, heaps, command lists, bundles etc
- Intel: Migrating to DirectX12: another valuable resource as it helped me understand many elements of the API.
I may be missing something, I´ll update the list in the future.
With all this knowledge, I started working on the port! The first step was to replace dx11 with dx11on12. Dx11on12 is an API that allows you to run dx11 code in dx12, it basically translates all the commands to dx12, this API is not intended to be used in production just as a helper in the transition. I thought that I could keep working most of the functionality while updating small parts but that's not how it works sadly. I´ve been basically working blind for a few weeks. After these first weeks of hard work and a bit of desperation, things started to come together. Within the second month, I had our demoscene working!
Lessons learned
First and most important, you need to organize yourself, when you are confronted with a task of this magnitude is easy to lose track and get frustrated. Dividing tasks into smaller subparts helps a lot. One example, when I had to implement the texture class, I had to write different methods to create the texture as a 2D,3D or array texture, I also had to make the different methods to retrieve the views for the texture (SRV, UAV etc). Initially, I wanted to make everything at once, but there is a lot to write! (at this point the .cpp for the texture class has 2000 lines of code). It helped A LOT doing small parts at a time and do non-related things in between (a task related to another system). This doesn´t mean that each day you can work on 10 different tasks! Sometimes you must commit to something and finish it.
The next lesson, use a graphics debugger!!! Having something to check what the heck is going on the GPU is really useful sometimes. A graphics debugger will show you many things like API calls, a list of resources, information about a selected call etc. There are plenty to choose from. Visual studio has its own, I don´t think it is really good but for most of the time, it was the only one I could use (other debuggers didn´t like the dx11on12 stuff). NVIDIA Nsight, this one has a ton of tools the problem is that it works inside visual studio and I found it too intrusive and it also provides a lot of information (maybe too much). And finally, PIX, I started using it at the end of the task, but I loved it! It is not intrusive and it also gives a lot of useful information. I would recommend PIX for anyone doing graphics-related things. I will mention, that you can´t just trust the debugger and expect that it will give you the answer without some head-scratching. You need to understand what is going on with your software and you also need to know how to use the tool and interpret the info it provides. Once you know it, you will be able to catch 'em all!
Conclusion
Initially, I thought I could never complete this task. But with the time, it was just a mater of finishing small components and in the end it all came together nicely. There is a lot of things I could talk about like how to handle root signatures, resource deallocation, barriers etc. But I think that will wait for another post.
Nacho.
June 25, 2017
Final, Nature Rendering
Hello!
Today I just wanted to show the result of the work done during the last months for the Nature Rendering project. I did this project as my final year project at Teesside University.
Today I just wanted to show the result of the work done during the last months for the Nature Rendering project. I did this project as my final year project at Teesside University.
I have to say that I'm really of the final result, as always, there are tons of things that I would do in a different way but that's the point of working on something (you will learn!).
Now I'm starting a new stage of my life, I have been working the last two weeks at Simul Software as Software Developer! I would like to start a new project (for my spare time soon).
For now, I´m off!
May 3, 2017
[Week 8,9,10,11 and 13] Final steps.
Hello!
The last post was more than a month ago, during that period was the Easter break. In those weeks, I have been working mostly on the report for the project. I have also worked a bit on the code. First I updated the day/night cycle system and also implemented a new effect: god rays (in screen space). For the report, I needed a way of measuring GPU time, for this reason, I added a new item to my gpu wrapper: A timer using OpenGl queries.
The last post was more than a month ago, during that period was the Easter break. In those weeks, I have been working mostly on the report for the project. I have also worked a bit on the code. First I updated the day/night cycle system and also implemented a new effect: god rays (in screen space). For the report, I needed a way of measuring GPU time, for this reason, I added a new item to my gpu wrapper: A timer using OpenGl queries.
March 21, 2017
[Week 7] Nature rendering
Hello once again
For this week, I only implemented one new feature: the first person walker. I added a method in my terrain class that retrieves the height of the terrain at the provided x,z point. With this, I´m clamping the position of the camera above the height of the terrain, so it looks that the user is walking on it.
To make it smooth and prevent heightmap precission errors, I did a lerp so its more smooth.
The other important thing I've been working on is optimizations. Until now, I've been rendering all the effects at full res. This works well but its not the best as it is taking much time. By reducing the resolution of this effects I gained 100FPS and you can't tell the difference.
The water reflections and refractions are rendered at 1/2 resolution. The lens flares and bloom effects are rendered at 1/4th! I tested the demo yesterday in a computer at the university (they have an old Nvidia quadro installed) and it runs at 60FPS.
I removed the Y position of the grass as now I'm sampling it on the geometry shader, this reduces in a third the space it takes to store the grass points.
I had a problem with the water fading (I changed the depth values by implementing the log depth buffer), I couldn't solve it in the correct way (getting back the linear depth) so I did a hack. I'm sampling the terrain heightmap to get the current height. This gives hard edges but I'm performing 5 samples and averaging them so it looks better.
Finally I found a bug with the terrain fragment shader. The fog method makes appear black rectangles on the screen. I will be checking that this week.
See you!
Nacho.
March 12, 2017
[Week 6] Nature rendering
Back to schedule!
This week I've been mainly working on the grass. I went with the geometry shader aproach. Each terrain chunk has a list of points where grass will grow, I stored it in the chunks so I could reuse the results from the frustum culling pass.
To generate the grass, first I calculate a LOD value, with this value I decide the number of triangles that the blade will have.
Then, I generate the blade, I made an algorithm that works with as much triangles as you want, so if I want to reduce of number of tris I dont have to rewrite it.
Finally I randomly rotate it so it looks more natural and also I animate it.
To simulate the wind, I'm mixing a few sin and cos waves which gives a constant wind effect with some bursts.
I also started working on a custom sky system... I couldn't make work O'Neils implementation with the postprocessing so I just decided to implement it. Right now I have the basis of it working: sun and color of the sky. Futher tweaking should be made so it looks ok.
Finally I started making a first person walker that will be used to explore the scene. I'm sampling the current height of the terrain acording with the position of the camera (an aplying a lerp so it's smooth) but I have a bug that I'll solve next week.
In the following weeks I will be working mostly on tweaks and solving bugs more that anything.
See you!
Subscribe to:
Comments (Atom)


